See what a week can bring........
Bad post title as it promises much but will deliver little. I've been a bit under par this week so seem to have spent a lot of time prevaricating instead of just getting on with it.
I have made a decision on a fireplace and have ordered a Victorian fireplace for the parlour and a Wilkswood fireplace from Jennifer's of Walsall. They are the Phoenix kits; like the stove I made,so that should be fun - no, really! I am also ordering some Bass wood to make the chimney breasts. The size of the piece has made the dimensions of the chimney breasts change from five inches wide to four inches and from one-and-a-half inches deep to one inch. I have searched and searched for clues as to the usual size of Edwardian chimney breast (and even asked a builder!) but there isn't a definitive answer. Both of the fireplaces are small bedroom-types so they don't need a large flue. I hope it works factually and visually.
I decided I wanted some tiling behind the sink and cooker area. I found a fantastic site belonging to someone who sells original Edwardian tiles. There were zillions to choose from. Eventually I settled on this one as being typical of the period, not too fancy and in the right colours - 'greenery-yallery'. I copied one tile, reduced it to scale and then repeated the pattern umpteen times.
This photo shows the paper after one coat of varnish. I wanted to be sure the colours wouldn't run before I went any further.
I pasted the paper to some thin card and gave the tiles a second coat of satin varnish. When they were dry I cut them out into individual tiles and started to lay them out on the pattern I had drawn for the wall space they were to go on.
Here they are all dry and on the wall. At this point I suddenly saw them as a row of Green Shield stamps and put myself off them completely. I can't seem to shift the vision.
With luck many of you reading this won't even remember Green Shield Stamps.
I did a pretty crude job of sawing off the wood from behind the sink and draining board area. It had the taps and plug chain fixed to it. These will need to be attached to the wall now via a couple of drilled holes through the tiled area. The tap needed sorting any way as the unit came with two taps and Ellen only has cold water. The plug chain is a bit more problematic. It was fastened through the wood with a bit of wire opened out like a paper fastener at the back. I am sure I can replicate that if I can find a bit of suitable wire. It needs a longer piece than the present one as now has to go through the thickness of the MDF back wall. The sink unit needs painting and varnishing. I am toying with the idea of a bit of the off-cut from the lino being used on the shelf below the sink. In the fifties of my childhood bits of lino came in useful for all sorts of places like this so I am sure our Edwardian cousins would have done the same; especially as lino was pretty newfangled and expensive. Waste not, want not.
 The lino was a bit of a debate. I knew I wanted lino as the kitchen was above ground level and wouldn't have been tiled. It could have remained with floorboards but I thought Ellen would choose easily cleanable lino when she re-did the living quarters. Many Edwardian lino patterns were very fussy and multi-coloured as they were used all over the house. The few 1:12 ones I found wouldn't do for the room I wanted.
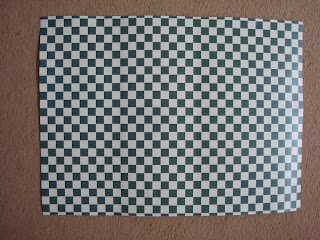
I have original source pictures for the ideas behind all my rooms. This is the one showing the feel that I want for the kitchen. (This was an advert from 1911.) With further reading I discovered that the floor in that picture was very probably lino and not tiles. They did do simple checker-board patterns. Yippee - all I had to do was buy an appropriately printed piece of flooring paper and glue it to a grey cardboard backing and hey presto I had lino. The problem now, like then, is that the lino looks like a cheap way of doing tiles!! Let it be noted here that it is a deliberate choice and not a cheap way out. The best of it being a tile pattern is that it is very forgiving when you have to piece it together to make the paper fit the room. There are five bits here and you can't see a single join.


 The lino was a bit of a debate. I knew I wanted lino as the kitchen was above ground level and wouldn't have been tiled. It could have remained with floorboards but I thought Ellen would choose easily cleanable lino when she re-did the living quarters. Many Edwardian lino patterns were very fussy and multi-coloured as they were used all over the house. The few 1:12 ones I found wouldn't do for the room I wanted.
No comments:
Post a Comment
To prevent spam your comments come to me first. I will be as fast as I can to post them and reply. Please do leave a message.